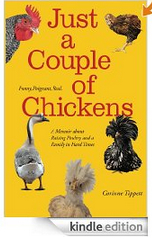
This photo looks about half this good when printed in the actual book. It will be better when I boost the contrast.
You can add line drawings and black & white photos, or other sorts of images, to the body text if you are self publishing a book. Simply include the graphics in your layout before you create your pdf. But there are limits to how good the images will look, and these five tips will help:
1. Make the photos look the best they can – with good contrast and sharpness. While you can put color photos in your electronic file, they will print in black and white unless you are creating a color photo book. Making your photos or images look nice in black and white before you paste them into your document will ensure they look the best they can in the book. The book printing process tends to flatten them out, so tend towards contrast – but not to the point where you lose detail.
2. Make them big enough. At least a third of the page if the image is a photo with a caption, and at least one inch high if it is a graphic at the beginning of a chapter. If your graphic is a page decoration, you can make it any size you want. Actually, you can make all of them any size you want as long as you stay within the print margins of your book size. Full bleed graphics are a different issue and I have no current experience with those. Generally, I try not to bleed.
3. Downsample your PDF to 300 dpi. Or you could make them 300 dip to begin with. This is a standard pdf recommendation. My soon-to-be-available “How To Self Publish A Book” book will have printed samples with different DPI tests so you can see what happens, but it isn’t ready yet. In the meantime, 300 dpi is a good general guideline. This does not apply to line drawings.
4. Include captions that cover the 5 W’s of good writing – What, Who, Where, When, Why. Actually, the fifth should be “how” but that doesn’t start with a W so I use Why. Readers will always read captions, and the captions of the photos you include in your text may be some of the first text your reader scans… especially when flipping through the book with a mind to buy, so make the best of that opportunity. Avoid describing things that are obvious in the photo and use the caption to add value and interest to your project.
5. Order a proof of your book with all of your photos in the text before you go much further with the project. The only way you will be able to tell for sure how your photos will look is to test them. Get your writing into your book design, insert the photos and size them to your taste, then go ahead with the proof. It’s not expensive to order a proof and it can save you a lot of headache later in your project. Once you know how your exact photos or images are going to translate to the medium you are working with, you can adapt your materials so that they show well.
Line drawings look really good in the current state-of-the-art print-on-demand books that you can produce as a self publisher. Photographs print surprisingly well, depending on how good they were to begin with. But if you have really stunning photographs or images that are the heart of your book project, you may want to look into producing a photo book. The only drawback is the production cost, which is the reason coffee table books have such a high list price… they have a high production cost. The technology is easily available, it’s just an issue of profit and loss.
I have included over 100 photographs in my grandfather’s biography, working titled “CJT, A Biography” and they look good enough to be exciting, but I am considering a color photo book as a future project. Many of the images in my grandfather’s archive are museum quality and contain celebrities and world leaders, so the book would not only be marketable, but would also be an important archive.
« My review of… Lulu.com The Chicago Manual Of Style, a book I love to hate… »